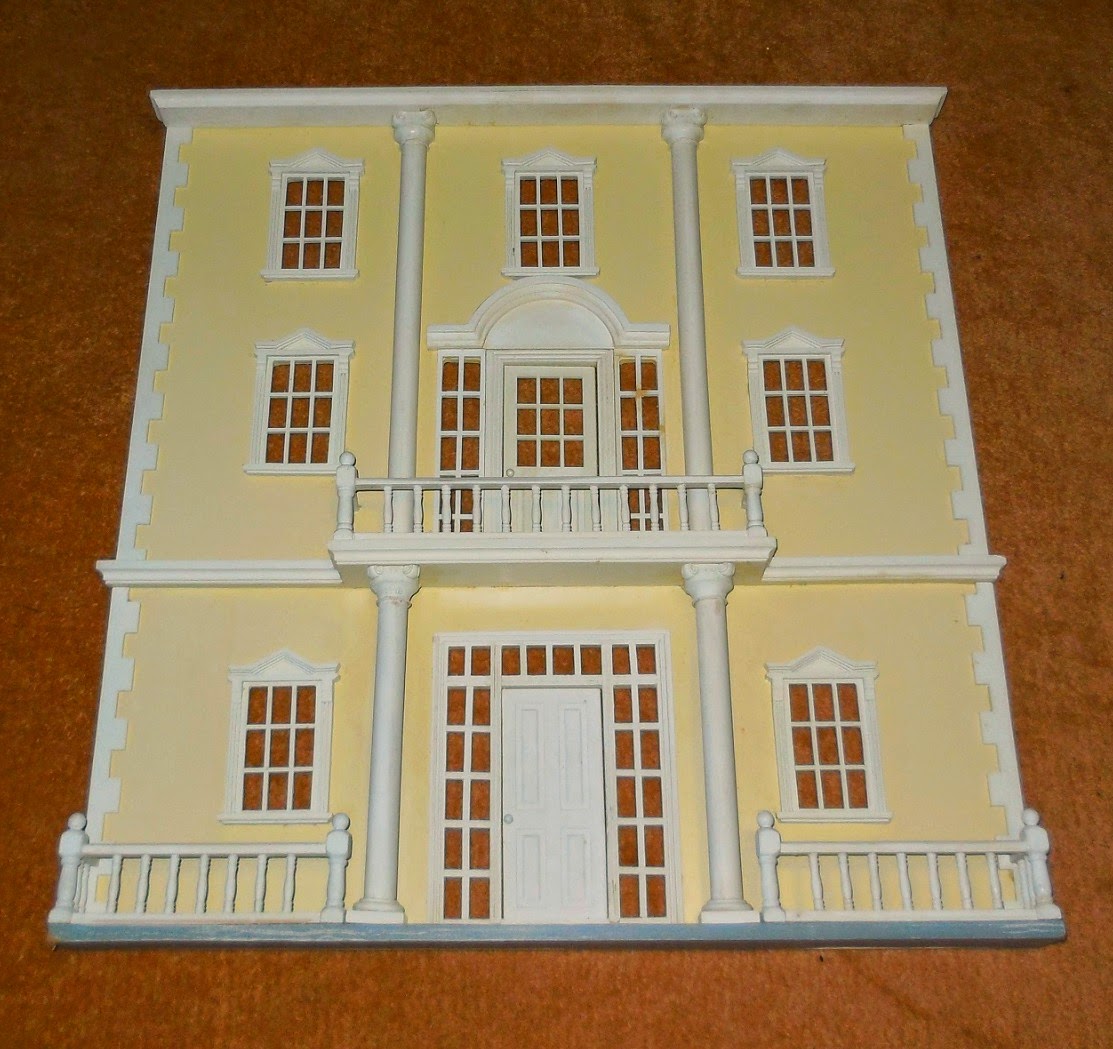
Wednesday, December 3, 2014

Georgian Townhouse reconstructed


I just realised this morning that I hadn't posted a photo of the Georgian Townhouse since we put it back together. It certainly looks rather different to the yellow and grey original. It also had an additional ground floor railing. Everything is a matter of personal taste but I feel that with the lower railing removed it looks less 'fussy' and allows other features to stand out more.  It also makes room for topiary or perhaps a little hedge to add extra interest and colour.

The original. 
The interior was reconfigured to create a stairwell/hallway at the back instead of having the stairs going through the rooms on the right-hand side of the house, and another partition added to the top floor to create another small room, plenty big enough for a bathroom.  The doors on this back wall don't open but the doors of the left side rooms (which you can't see here sorry) open into the hallway. This has created an extra dimension to the interior that creates a more realistic impression.


Skirting boards need to be added but the interior will remain pretty much as you see it here - a modern neutral backdrop so that the furniture and accessories will be the stars of the show. With  the addition of furniture, wall art, rugs. lighting, etc I think this house will really come to life. 


That's a project for another time though. In just a few days we'll be travelling to New Zealand to spend several weeks at my 1:1 playhouse ...


... so I'll take this opportunity say thanks for making my blogging journey through 2014 rewarding and fun and wish you all a wonderful holiday season with good wishes for an absolutely fantastic 2015 that delivers all that you hope for. 

**************

Friday, November 21, 2014

Old newspaper collage sheets for your projects

These collage sheets of old newspapers, which might be useful for attic wallpaper, lining trunks, suitcases and old cupboards (and probably other things I haven't thought of), were created by me to fit an A4 page. 

Feel free to download, print and share but it is NOT permitted to offer the sheets for sale in printed form or as a digital file. 

Have fun!

French


Various languages


Thursday, November 20, 2014

A lovely new blog

I found a lovely new Swedish miniatures blog today, click here to pop over and say hi.


Tuesday, November 18, 2014

A lot happens when you turn 5!

Today is my blog's fifth birthday - my sincerest thanks to all of you who have supported my mini endevours over the past five years. Without your constant friendship and encouragement I very much doubt that I'd have made it this far! Big hugs all round!!

And I'm very pleased to be able to tell you today that Fairy Meadow Miniatures is now stocking selected pieces of my work. A huge thank you to Lorraine for having faith in me and partnering with me in this way.


Also, I've now set up a Page on Facebook so that I can engage more easily with the non-blogging miniature community as well as those bloggers who hang out there lots these days. 

A lot happens when you turn 5! 


Wednesday, October 1, 2014

Bed time!

This inviting little bed started out looking rather cold and boring... 


... amazing what a little paint, fabric, vintage lace and a few hours work can do! 


What's hiding, neglected, in your stash that you could transform into something you'll love?

Friday, September 19, 2014

All the fun of the fair

I had heaps of fun yesterday dressing this kitchen hutch which will be for sale on my table at the Sydney Northern Districts Doll and Bear Show tomorrow...


... as will this six piece living/dining room set. It'll be hard to part with it though because I really love it! I guess I just have to look it as a chance to share that love :) 


Offering these 'one of a kind' pieces created from my extensive stash of furniture and accessories (some purchased, most of which have been revamped/decorated by me, some created by my own fair hands) is part of the process of de-stashing in preparation for a move back to New Zealand some time next year. Quite tough to do but entirely necessary - I'd have to hire a cargo ship for my exclusive use if I was to take it all with me! 

Monday, September 8, 2014

Modern kitchen revamp revealed


Here it is! This is the kitchen revamped and reconstructed. 

The original sink was discarded and a new recessed sink installed, I'm still waiting for the 'gooseneck' taps to come from the US.

 I've been playing with decals lately, had fun with a few plates and this set of storage jars.


Paris sign from MiniFanaberia


Preserves by Nina Eary 

Tiny jam jar from LugArt Petite

'Pasta' plate from Carrie at A Lavender Dilly


I've had the vegetables in my stash for a long time, the person I bought them from is no longer around, a pity because they're really lovely. 

Just a reminder of how it looked before ... 

... worth all the effort I think. 

Thursday, August 28, 2014

Georgian Townhouse makeover continues!

Yikes! - it's two months since I posted that all had come to a halt on the Georgian townhouse transformation on the eve of the Penrith show. In that time some things have moved on and some haven't! 

The house is still in pieces but that is in fact a good thing because it's made it much easier to work on the windows and doors. When I bought this house I didn't realise that the windows weren't glazed (which would have made for a very breezy interior), nor were they framed on the inside. 


All the windows have now been glazed and framed and extra framing added to the doorways. It was quite time consuming but I'm delighted how much it's lifted the look of the inside of the front so well worth it. 


Hopefully the reconstruction of the house will happen this weekend, including the addition of the new interior walls. What a relief it'll be when the last screw is in place! 

Until recently it was my intention to upgrade this house and keep it for myself so I also bought kitchen units for it. Although I'd really like to keep the cabinets it makes sense to offer them for sale with the house as an optional extra because the kitchen has been slightly re-sized to accommodate them -  a new owner might not be so lucky finding cabinets that will fit so perfectly. 

Of course I couldn't resist making-over the cabinets. Like the house itself, the first step was deconstruction. The drawer handles weren't right for a kitchen, the sink was totally wrong in every aspect (and had only one tap!) and the black on the counter tops too harsh for cabinets that have vintage features. 


It's well on it's way to having a totally new look, will share that with you soon - promise!

Saturday, June 28, 2014

So close and yet so far!

I've hit a small glitch or two in the reconstruction process today because of the extra internal walls, not fatal but time consuming so I'm not sure if I'm going to get the house finished for tomorrow :(  Just posting this so that anyone planning on going to Penrith especially to get a first hand look at it is aware that it might not make an appearance. If that changes and I do get it together I'll post very quickly tomorrow morning to confirm that - so watch this space for last minute news!

UPDATE - It's now 6 am Sunday morning, SHOW DAY and I'm up early to get my bits and pieces together and looking forward to meeting new people and having a fun day - without the house. I do thank you all for your encouraging comments but by the time you were so kindly writing them I was in bed fast asleep. 

It was early evening when I called 'tools down', my thinking process was getting fuzzy (not good when decisions are about drilling holes) and I was beginning to think along the lines of saving time rather than producing the best result. When I realised that speed not quality had become my priority I decided it's much better to allow more time to make it the best that it can be than keep going on that basis just for the sake of meeting a self imposed deadline. My commitment was to do my very best to have it at the show today and I certainly did that so I am totally fine with my decision. 

I'm off on a house-sit for 10 days from tomorrow (taking care of a super cute Maltese dog and a pussy cat) so won't get back to it for a couple of weeks but when I do I'll enjoy finishing it to the standard I really want it to be rather than the standard time allowed. I've got a table booked at the Sydney Northern Districts Doll and Bear Guild Fair on 20 September so there's ample time to achieve that before it's next 'engagement'.

Thanks so much everyone for coming along for the ride, it was a bit wild, and it hit a rather large speed bump at the end, but it's been great fun and we're all still alive to tell the tale. Now I have to run and get organised for today's show. 

Friday, June 27, 2014

Two week transformation challenge - interior colours

Even though the house hasn't been reconstructed yet this 'mock-up' will let you see the interior colour palette. Doors are painted with Citadel Skull White (same colour is used on the outside for doors, windows, columns and balcony balustrade), the wallpaper is white with very tiny (almost indiscernible) flecks of blue/grey, floors are painted with Taubman's Silver Charm, a pretty French grey which has been applied with a roller so that has a slight texture to it. The colours combine to create a neutral background suitable for a range of furnishing styles from dark stained 'traditional' furniture to French Country/Gustavian, and anything in between. (The armoire is a custom order ready to send off to its new home).  

Wednesday, June 25, 2014

Two week transformation - Part 7


Sometimes the tiniest things can make a big difference - the new front door hardware makes it look a little bit special rather than the same as every other door in the house.

I've nothing more to show you now until the house is put back together which probably won't happen until the weekend because it's a job that requires more than one pair of hands. Anyway, let's see how that goes... 

Tuesday, June 24, 2014

Two week transformation challenge - Part 6


More progress to report - yay! One of the jobs I've done today is filling in the stairway holes in each floor. The original design has stairs on the right wall on each level but although they make a nice feature it means that each of the right end rooms are exposed to foot traffic so it limits what they can be used for. My solution to that has been to redesign the layout, removing the stairs, patching the holes, adding an internal back wall to create a hidden backstairs void. 

Other steps completed in the last couple of days are papering all the internal walls, painting the doors (all 7 of them!) and painting floors and ceilings as a temporary measure because I'm unlikely to get those surfaces lined before the weekend and the stairway hole patch doesn't look too pretty. 

Not long now and the reconstruction process begins! 

Monday, June 23, 2014

Time is flying by!

I didn't accomplish anything like as much as I expected to over the weekend so now I'm seriously behind schedule but I'm still working hard so please be patient and remember - all good things come to those who wait! 

Friday, June 20, 2014

Two week transformation challenge - Part 5


I promised you the colour reveal so here it is, a bit late and not the entire facade, but that's coming soon I promise. The contrast between the roof and walls is a bit greater than it looks here, the walls are a shade or two lighter in reality.  

The paints used are Taubmans Beige Ash (roof) and Quill (walls) complemented with Skull White (windows) which is a Citadel brand paint used by model makers which I borrowed from my son - once again Warhammer meets dollhouse! It's very similar to Whispering Winds, the shade suggested by Taubmans to compliment the darker 'greige' shades, but I used the Skull White because of the advantage of being able to spray it on which makes it much easier and quicker to deal with the intricacies of the window frames. 

It's almost time to turn my attention to the interior which involves making new dividing walls - one job that I won't be doing myself but will be delegating to my younger son who, unlike his mother, can saw in a straight line! I'm unlikely to post over the weekend but hopefully there will be quite a bit of progress to reveal on Monday. 

Thanks again for all your comments and email messages - they're definitely the petrol in my tank! 

Wednesday, June 18, 2014

Two week transformation challenge - Part 4


I love a nice grey, a glance at my header will confirm that, but the manufacturer's grey on this roof (still visible on the dormer recess) was just too strong so it had to go. The replacement (Taubmans Beige Ash - not quite grey, not quite beige) will give you a hint of the exterior palette which hopefully will be fully revealed by the end of today. 

Thanks for following along - I can't possibly give up knowing you're watching over my shoulder :) 


Tuesday, June 17, 2014

Two week transformation challenge - Part 3

Goodbye Yellow!

Today's task is undercoating the exterior in preparation for the new colour. I don't want to risk any of hint of the yellow showing through and changing the look of the new paint colour so although it's a bit time consuming and unnecessary in a way in that the original paintwork is in good condition I think it'll be time well spent. (The patchy grey bits on the side are where I took the quoin strip off - I've decided now that it's going to be the same colour as the wall rather than an 'accent' colour as it was originally so could have left it in place after all).

I've also been to my local Bunnings hardware store and purchased the new exterior paint. (I think I nearly drove the unlucky paint company sales rep mad with questions about all the different paint choices but she managed to smile through it all.) I can't wait to get it on the walls now but there's more undercoating to do first...  

Monday, June 16, 2014

The two week transformation challenge - Part 2


How lucky that the sun is shining today after a dismal weekend. Perfect weather for painting. The inside surfaces now have a good layer of undercoat to seal the surface ready for the new wallpaper. 


I decided to follow the manufacturer's process of using a real wallpaper as it has the advantage of durability and speed of application. I went to the local wallpaper shop expecting quite a range of options to choose from but nothing on display was suitable at all. I explained to the owner that I only needed one roll, or even a part of a roll, in a light neutral colour with no, or a very fine, texture. When she returned from the backroom I didn't know whether to laugh or cry - 3 of the 4 rolls she had were almost exactly the same as what I'd stripped off! Yes they were light and neutral in colour but the texture was totally out of scale. 

The saving grace was the roll of almost white Scandinavian design paper from Fiona Wall-design in Poland. It has very tiny blue/grey specks that give it a bit of warmth. This paper will pick up any grey or blue in furnishings and accessories while at the same time providing a nice neutral backdrop for other colour palettes. And if will, of course, be possible to add another layer of paper over it in the future if desired. 

The next job for today is painting all the windows and doors, they don't really need it but I figure that if everything else is getting a 'face-lift' they deserve a coat of paint too.  

Thanks for all your encouraging comments so far!!  Now it's back to work for me ... 

Saturday, June 14, 2014

The two week transformation challenge - Part 1


Two weeks to transform a big house with 7 rooms and an attic?!

Have I finally (and completely) lost my mind?! 

I've booked a trading table at the Penrith Dolls Bears Craft and Collectibles Show on Sunday 29 June - just two weeks away - and I've committed to do my very best to present a BIG house for sale. But what's a challenge if it's not a REAL challenge so I'm also hoping to get it furnished (at least partly) as well! I'm going to be the only miniaturist trading there so even if the house doesn't sell hopefully it'll be a point of interest and maybe even convert a few doll collectors to our mini world. 

For some of you out there who are fast workers this would be a 'walk in the park' but I'm one of the slowest builder-decorators in the world. However I have a secret weapon - a flat pack house I bought just before I started building the French shop and apartment. It's been sitting, in pieces, near my work table waiting patiently for attention and it's sure going to get it now! 

Step 1 - Removing the manufacturer's wallpaper

No pics of the original wallpaper sorry because I was in such a hurry I didn't think to take any but trust me, it HAD to go. What a mission that was! As per usual with wallpaper (this was the real stuff, not dollhouse paper) the outer layer came of easily but in spite of using what I think is the best wallpaper stripper in the universe the bottom layer pretty much refused to budge. Obviously some unknown adhesive from hell had been used here so I gave up on the plan to remove all traces of the original paper removing only what did lift and sanding back the rough edges of what was left once it dried. (Foolishly without wearing a mask so a lot of sneezing followed). 


Step 2 - Preparing the exterior for a new coat of paint

The main exterior colour of this house is too yellow. It needs a more neutral colour scheme in order to be able to blend in with the widest possible range of potential new homes so a repaint is a must.


I didn't fancy having to work around all those windows, and the balcony railing posed a real problem, so off it all came!


I was a bit shocked at how easily the windows in particular popped off. They'd been attached with hot glue which as you can see was only holding in a few places. They'll be way more secure when I put them back on again.

Well there's no going back now! I hope you'll have fun following along on this renovation journey but be sure to 'buckle up'  because it's going to be a wild ride! 

Friday, May 23, 2014

French bathroom, almost finished


For such a tiny room this bathroom has been a LONG time in the making but I wanted to get the details 'just right'. (Once the adjoining walls are installed it will be a major exercise to access the room to change anything.) With the exception of the sign everything on the shelf came from Synnove almost exactly four years ago, at last they're out of the little box and basking in the rays of the morning sun. The vintage-look  'metal' sign is an image printed on cardstock, edged with dark brown ink to create the rust effect, and covered with several coats of clear nail polish which gives it the look of having an enamel finish (although it doesn't really show up in the photo).

Upper hallway (almost) hidden cupboard


The image on the left shows how the bathroom looks through the window, and if you look through the doorway you can see part of the upper floor hallway. On the far wall you can just see the cupboard. It will be almost entirely hidden from view when the wall that divides the hallway from the bedroom in front of it is put in place. The only possible glimpse will be through the bathroom exactly as you see here. I suppose it could be considered, then, that it was a waste of time doing anything with this cupboard at all but I really wanted to do it properly for my own satisfaction.  It's very shallow (about 1 cm only) but I wanted to try out creating the illusion of proper depth.  I think it's worked fairly well.

I hope you've enjoyed these little peeks, hopefully I can bring you final pictures of both the bathroom and the hallway soon. It'll be such an achievement to have FINALLY completed the back of the house on this upper floor that I think some kind of celebration will be in order! 

Tuesday, May 6, 2014

My French chairs for sale

Add a little French charm to your miniature living room or bedroom.  These 1:12 scale chairs that have been handpainted and upholstered by me are for sale. The upholstery is decorated with charming vintage French aubusson images. The paintwork can be distressed on request if you prefer a more 'faded elegance' look.

The price is $65 for one or $120 for a pair (Australian dollars) plus postage.  For conversion to other currencies click here

Please note that except for the first two designs below ("Lovers" and "Rose Bouquet") which are both available in a pair I have only 1 of each of the others and it will be some time before there will be any more.  


Please email me (normabennett@hotmail.com) if you have any questions or to discuss a purchase. 


Monday, May 5, 2014

Sydney Minis Fair is over and I'm still alive ...

... but only just I think - it was fun though and well worth the effort.  I got very little time to look around so the plan to have some photos of interesting exhibits didn't work out, all I've got to share is one very quick shot of my own table (the only photo I took all day!).  I promise to be better organised next time! 


Oh yes, the kitchens! Well the report on those is that I did sell one, to a good friend who wasn't actually looking for a kitchen sink but just had to take one home and now will have to build a kitchen for it, bless her. The others, and various remaining armoire, sofas, chairs, etc will be available to purchase online shortly.  In the meantime feel free to email me if you have any questions. 

Tuesday, April 29, 2014

Sometimes just one kitchen sink isn't enough, but I didn't plan on five!


SOLD


SOLD


I was pleased to find ready-made kitchen benches that are almost exactly the same as the one I designed and made for my French kitchen so I thought I'd refinish and accessorize two for the Sydney miniatures fair. However, the first package from my supplier went missing in the mail, as did the second, so a third was sent and then all three turned up so I suddenly had six! I've kept one aside for a French cottage kitchen project I'm planning for myself but these will all be for sale. 

I don't expect to sell all of them at the fair, a kitchen bench is not the kind of thing you buy unless you're really in need of one, so I expect there will be some available here from next week if any of you have an interest. (Email me: normabennett@hotmail.com )

(Handwoven mats are by Glenda Howell; jams by Nina Eary; crockery decoration, tea towels and little tray of muffins by me).


Friday, April 11, 2014

A little bed goes to upstate New York!

This is a secret project I've been working on, a gift for my blog buddy Claudia (Mockingbird Hill Cottage) who lives in upstate New York (ok, technically that's not absolutely correct since she lives not all that far from NYC, but it's got a nice ring to it don't you think?). She has the cutest cottage style dollhouse but has been in need of a bed for a long time and I had a bed frame that I wasn't using so I couldn't resist making a dressed bed for her almost empty bedroom.  


The frame was originally shiny black but has been spray painted matte off white, not by me but by my son who is a dab hand at spray painting base coats for his hand-painted Warhammer models. Dollhouse meets Warhammer, who would have thought??!

Claudia chose pink toile for the main fabric and likes a simple 'tidy' look to her bed. I'm a bit more of a 'messy' bed kind of girl so it was a personal challenge to be so neat! I was hoping that the exercise might rub off in real life but one look in my bedroom will confirm that hasn't happened unfortunately.

I'm still frantically painting and upholstering in preparation for the fair in 3 weeks time.  Many thanks for your nice comments about my efforts so far, and for your good advice, all greatly appreciated.

Photo credit: Claudia Hill